Jam Complete! Thank you!
The entries are all in. Get them here:
https://itch.io/jam/merveilles-hyperjam/entries
This page will remain up so that people can continue to access the HyperCard resources necessary to experience (and deconstruct!) the jam entries.
Running HyperCard in Mini vMac
Download this starter pack .zip (7.87 MB)
This file contains everything you need to get started, except for a copy of the Macintosh emulator itself, Mini vMac.
Extract the starter pack zip.
Download a Mini vMac build for your OS from here: https://www.gryphel.com/c/minivmac/dnld_std.html
Place the Mini vMac executable into the extracted starter pack directory.
Run Mini vMac. Loud boot noise warning! After a few moments with a blank screen, you should see an icon of a disk with a blinking question mark.
Drag and drop the
Workstation (Boot).dskfile onto the Mini vMac window. Your virtual Macintosh Plus should start booting.Once the desktop appears, double-click the ‘Apps’ folder, then double-click the ‘HyperCard’ icon.
Ride the mind-bicycle.
Interacting with Mini vMac
Press Control-M to double the size of the Mini vMac window.
Press Control-F to enter fullscreen.
If you're running Windows and Linux as your host OS, you may have trouble using the emulated Mac's Command and Option keys when you aren't in fullscreen mode. (Mini vMac consumes all input when in fullscreen mode.)
Read more about Mini vMac's keyboard handling: https://www.gryphel.com/c/minivmac/hardware.html#keyboard
In the Windows or X versions, the ‘alt’ key is used for the emulated command key, and the ‘windows’ key (or the ‘application’ key) is used for the emulated option key.
Fortunately, there's an escape hatch—on all platforms, the F1 key is an alias for Option, and F2 is an alias for Command. So, if nothing else, you can use those keys instead.
If you want to have convenient use of Command and Option keys in Windows, but don't want to always run Mini vMac in fullscreen mode, you can use this AutoHotKey script:
#IfWinActive ahk_class minivmac
LCtrl::F1
LAlt::F2
#IfWinActive
Importing Files
The Workstation boot disk has a few utility programs. One of them is ImportFl, which is a special program for use inside of Mini vMac. It will allow you to drag and drop files onto Mini vMac in order to transfer them into the virtual machine. You can read more about it here: https://www.gryphel.com/c/minivmac/extras/importfl/
Disks
You should probably save your project files on a dedicated floppy or hard drive disk image, separate from the boot disk image of the computer. This will let you make easy backups of it as you work.
Do not try to make backups of your work by exporting the files directly back into your host OS—unless you're running a classic Mac as your host, the resource fork of your classic Mac files will be lost, and your files will be ruined.
Instead, use disk images to store your work from within your emulated virtual machine, and create backups of those disk images in your host OS.
The starter pack comes with a set of blank disk images for you to copy and use. You can get a properly sized one out of the zip file Blank 800K Floppy.zip, or get bigger ones from More Blank Images.zip.
Read more about the blank disk images:
https://www.gryphel.com/c/minivmac/extras/blanks/index.html
Need a Bigger Screen? Emulate a Macintosh II
The Macintosh Plus has a screen resolution of 512x342. You'll probably want your HyperCard stack to fill up its entire screen. But that means you won't have room for the menu bar or any tool palettes while you're editing your stack. If you want some extra screen real estate while you're working on your jam, you can emulate a Macintosh II, which has a resolution of 640x480.
Mini vMac has separate builds that emulate a Macintosh II instead of a Macintosh Plus. You can download one for your OS from here: https://www.gryphel.com/c/minivmac/dnld_mii.html
The same Workstation (Boot).dsk file also works for the Macintosh II version of Mini vMac.
Just make sure that your jam entry still works on a Macintosh Plus. You can use the Viewer Only (Boot).dsk image to verify that your 800K floppy containing your HyperCard stack will work properly for the gallery.
Finished Entries
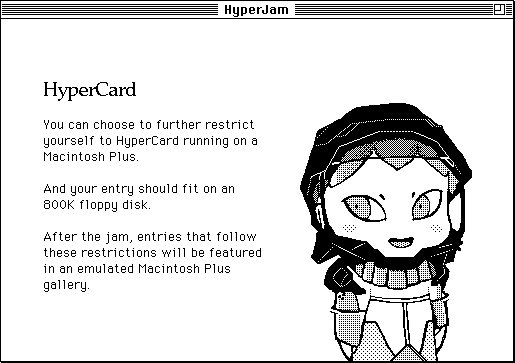
To be included in the gallery, your HyperCard entry needs to fit on an 800K floppy disk. You don't need to try put the HyperCard application itself onto that disk. You only need to submit your HyperCard stack. The virtual gallery's Macintosh Plus will have HyperCard Player already installed on it. HyperCard Player is the same as HyperCard, except its ability to create new documents is disabled.
The entry stacks will be run separately from one another, not merged into a single stack. Don't worry about your stack having to play nice with other stacks. You can use the Viewer Only (Boot).dsk disk image to check that your entry will work correctly in the gallery. If you're having trouble or need help, or you're worried you might be doing something wrong, let one of us know, and we'll help!
HyperCard Resources
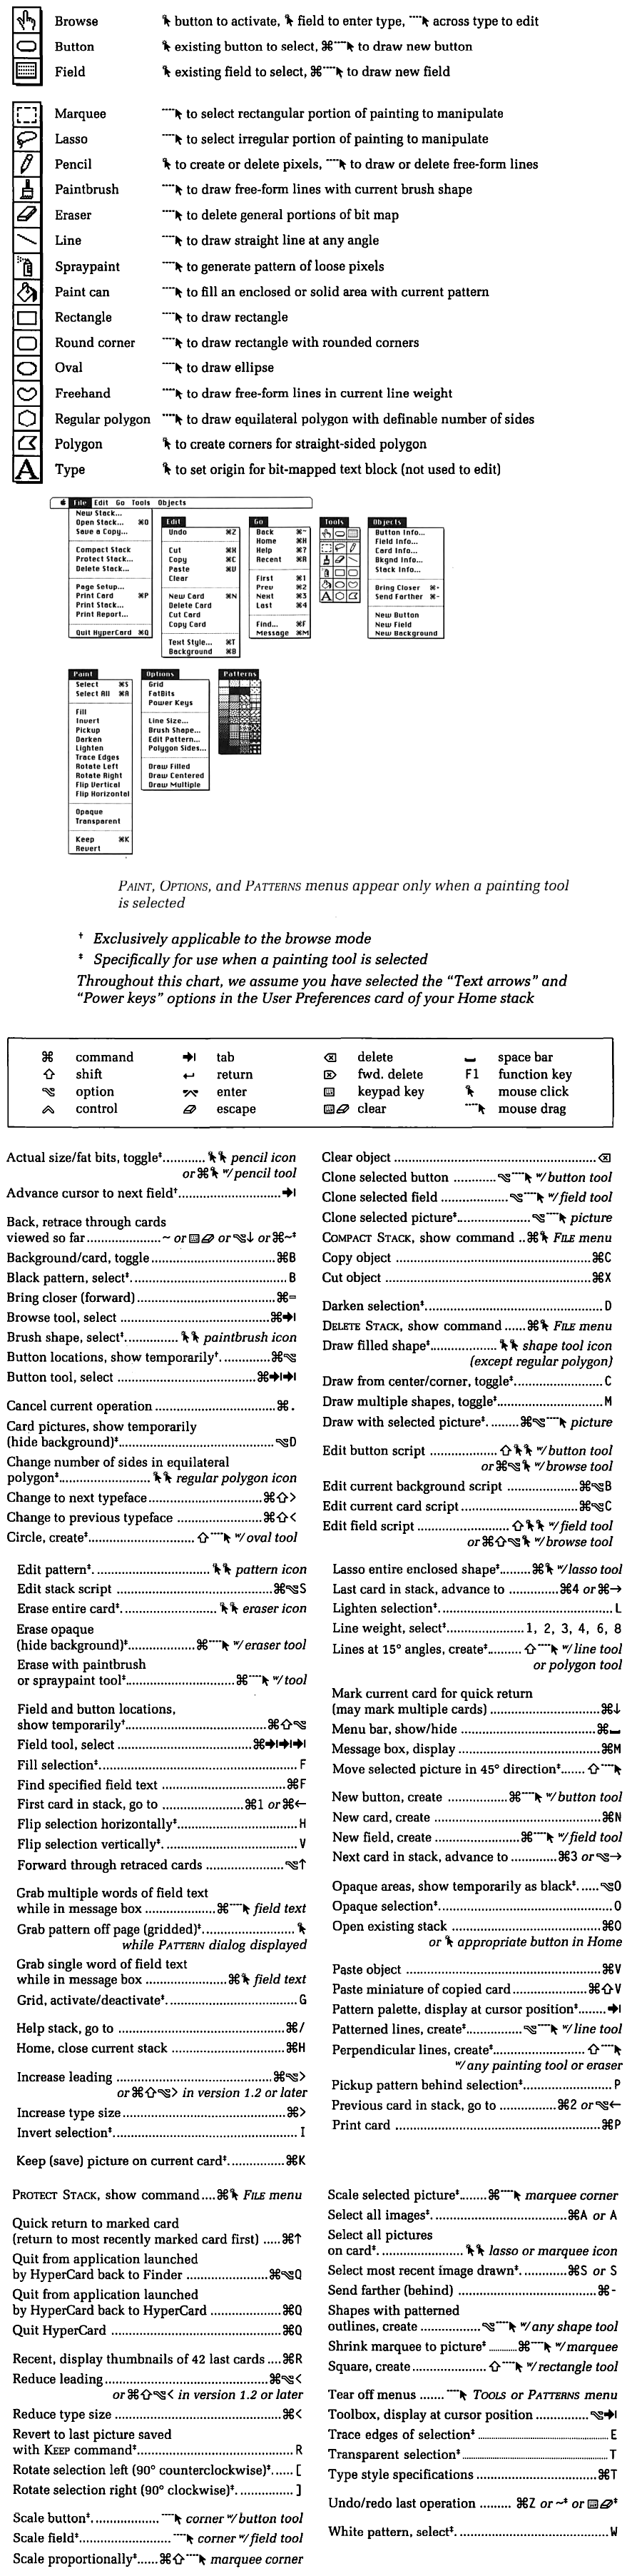
- HyperCard Shortcuts Quick Reference Cheat Sheet
- HyperCard Reference (Full Manual)
- HyperCard Script Language Guide (HyperTalk programming language)
- HyperCard stacks on archive.org
Thank You
None of this would be possible without the effort and vigilance of digital preservationists. Consider donating to these projects:
- Gryphel: https://www.gryphel.com/c/help/index.html
- Internet Archive: https://archive.org/donate/
- Macintosh Garden: https://www.patreon.com/macintoshgarden
Files in Starter Pack
From File Descriptions.txt:
* vMac.ROM and MacII.ROM
    Required by Mini vMac to boot.

* Workstation (Boot).dsk
    A boot drive that works for both a virtual Macintosh Plus and a Macintosh
    II. This has HyperCard 2.4.1 already installed, plus some useful system
    utilities. The popular WindowShade extension has also been installed, so
    that you can double-click window titlebars to fold and unfold them.
    System 7.1.

* Viewer Only (Boot).dsk
    A minimal boot drive for a virtual Macintosh Plus, with HyperCard Player
    already installed. Your HyperCard entry should be tested to work on this
    sytem. This drive/disk image only boots on a Macintosh Plus.
    System 7.0.1.

* Blank 800K Floppy.zip
    A zip file containing a .dsk image of a blank floppy. Extract the .dsk file
    and give it a better name, then drag and drop it onto Mini vMac to insert
    the virtual floppy. You should try to get your game jam entry to fit onto
    one of these. (Macintosh floppy drives at this time were only 800K, not
    1.44MB.) The .dsk file is inside a .zip file to make it smaller. It's
    mostly zeroes, and compresses down to 1.3K.

* More Blank Images.zip
    This is like the Blank 800K Floppy.zip, except it contains a bunch more
    pre-formatted blank images at various sizes. Use the 'M' subdirectory to
    get images sized in megabytes -- for example, 020M.zip contains 020M.dsk,
    which is a 20 megabyte disk image. The sizes go up to the hundreds of
    megabytes, though using disk images this large isn't recommended, because
    the disks can become corrupted if your Macintosh crashes. You'll want to be
    making backups as you work, and it's harder to back up huge images.

    This is just a renamed blanks-1.0.0.zip from the Gryphel Mini vMac website.
    Read more about it here:
    https://www.gryphel.com/c/minivmac/extras/blanks/index.html

Before copying backups of your disk images in your host operating system, make
sure to eject your virtual disks by dragging them into the Trash inside of your
virtual Mac!